
.jpg)

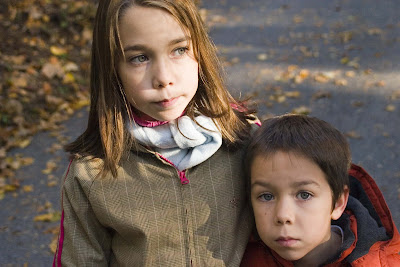
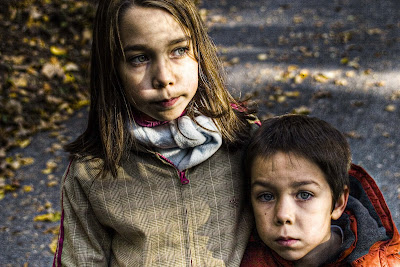
I know some people have been wondering about HDR. Here's a little example of how images can be combined to make an HDR image. Now, after combining the images I did a bit of fine tuning. HDR images don't just automatically look like this as soon as you combine the photos.
So, the first three images are the photos i used to create the HDR image. The fourth is the HDR image itself. Enjoy.

5 comments:
I like these, although the final product almost makes them look dirty. But I'm interested in learning more about this process. I think it'd be fun :] Good job!
Excellent. I also did an HDR experiment today. I had no tripod, so I put the camera on high speed, and auto bracketing. Is this how you shot this image, or is it just three different versions of the same RAW file? I don't know if HDR was necessary here though. I think you might have gotten a similar effect using a shadow/highlight adjustment on the top image. Once again, I am impressed with you experimentation and effort. I am just going to be tougher on you because you have been to Tokyo.
Colleen, bug me abou doing an HDR project. If there is any time while I am still there, we will do it.
Check out my HDR experiment at jeff365.blogspot.com. I am always into critique!
col,
i coulda smoothed it out. but i didnt care enough to. hah.
i liked your hdr experiment mr reeder.
and no, it wasn't necessary at all really.
i just did it for the heck of it. and to give a bit of an example.
it was split exposures. the same exposure on three different settings... not three separate exposures. three separate exposures are really impossible with portraits.
Post a Comment